Honeywell FocusPro 6000 WiFi Installation Overview
The Honeywell FocusPro 6000 WiFi thermostat provides remote access via Total Connect Comfort․ This guide details the installation process, including wallplate mounting, wiring, and network connection․ Follow each step carefully for successful setup․
Wallplate Installation
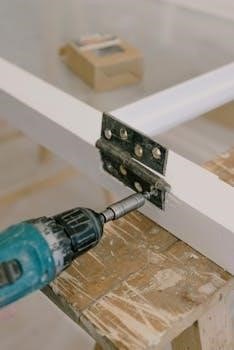
Before commencing any wiring, the wallplate must be properly installed․ Begin by removing the battery holder from the new thermostat․ Then, gently pull the thermostat away from the wallplate to detach it․ You will notice a wire hole through which the existing wires must pass․ Ensure the wires are fed through this opening․ Now, position the wallplate against the wall, aligning it with the existing mounting holes․ Use the provided screws to securely fasten the wallplate to the wall․ Make sure it is level for proper thermostat mounting․ Take care not to over tighten the screws․ Once mounted, the wallplate provides a stable base for the thermostat․
Removing the Wallplate
To begin the process of removing the wallplate, start by ensuring that the power to the thermostat is switched off at the breaker box․ This prevents any electrical accidents during removal․ Next, carefully detach the thermostat unit from the wallplate; this is usually done by gently pulling it away․ Locate the battery holder and remove it from the thermostat․ With the thermostat detached, you should be able to access the wallplate and its mounting screws․ Now, unscrew the wallplate from the wall․ Once the screws are removed, the wallplate should easily detach․ Be careful with any wires that may still be attached during this process․ The wallplate is now ready for any necessary changes or upgrades․
Mounting the Wallplate
After removing the old wallplate, prepare the area for mounting the new one․ Ensure the wall surface is clean and free of any debris․ Carefully feed the wires through the designated wire hole in the new wallplate․ Position the wallplate against the wall, aligning it with the existing screw holes or marking new holes if needed․ Using the appropriate screws, secure the wallplate to the wall, ensuring it is level․ Double-check the alignment before fully tightening the screws to avoid any issues during thermostat installation․ Ensure the wallplate is firmly attached to the wall for a secure connection․ Make sure that the wires are free and not pinched or damaged in the process․ This will ensure proper contact when you connect the thermostat․
Wiring and Connections
Correct wiring is crucial for proper operation․ This section details terminal designations and provides guidance for both conventional and heat pump systems, ensuring a secure and functional setup․
Wiring Terminal Designations
Understanding the wiring terminal designations is essential for correct installation of your Honeywell FocusPro 6000 WiFi thermostat․ The R terminal is typically for 24VAC power, while the C terminal serves as the common wire․ The W terminal controls heating, and the Y terminal manages cooling․ The G terminal activates the fan․ For heat pump systems, additional terminals like O or B for reversing valve control may be present․ Always refer to the thermostat’s manual for the specific terminal assignments to ensure proper connections․ Incorrect wiring can damage your system or the thermostat․ Double-check each connection before proceeding to the next step and ensure all wire connections are secure․
Wiring Conventional Systems
For conventional heating and cooling systems, the wiring of the Honeywell FocusPro 6000 WiFi thermostat involves connecting specific wires to the corresponding terminals․ Typically, the R wire (24VAC power) goes to the R terminal, while the C wire (common) connects to the C terminal․ The W wire, which activates the heating, is wired to the W terminal․ The Y wire, for cooling, goes to the Y terminal and the G wire, responsible for the fan, is connected to the G terminal․ Make sure that each wire is securely fastened and that no bare wires are exposed․ Double-check the connections against your system’s wiring diagram to avoid any errors․ Incorrect wiring can lead to system malfunctions or damage to the thermostat․
Wiring Heat Pump Systems
When wiring the Honeywell FocusPro 6000 WiFi for heat pump systems, the process differs slightly from conventional setups․ The R wire still connects to the R terminal, and the C wire goes to the C terminal if available․ For heat pumps, the O/B terminal is used for the reversing valve, which changes between heating and cooling modes․ The Y wire is connected to the Y terminal for compressor operation, and G goes to the G terminal for the fan․ Additionally, if there is an auxiliary heat source, it will connect to the AUX or E terminal․ In some cases, you might need a jumper wire between AUX and E if there is no emergency heat relay․ Verify that all connections are secure and consult your heat pump system’s wiring diagram to ensure correct wiring․ Improper wiring can damage the system․
Thermostat Setup
After wiring, the FocusPro 6000 requires mounting and initial configuration․ This involves securing the thermostat to the wallplate and setting basic parameters for your heating and cooling system․
Thermostat Mounting
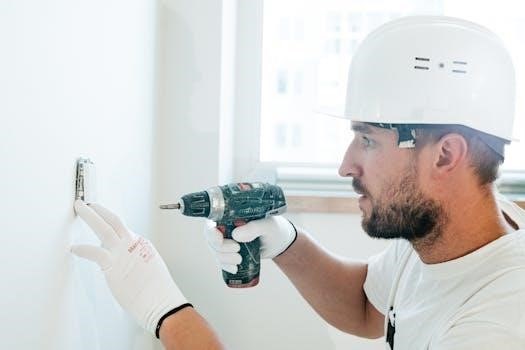
Before mounting the thermostat, ensure the wallplate is securely attached to the wall and all wiring connections are correct․ Carefully align the thermostat with the wallplate, making sure all pins line up properly․ Gently press the thermostat onto the wallplate until it snaps into place․ Avoid forcing the connection․ Once mounted, verify the thermostat is firmly attached and doesn’t wobble․ If the thermostat has a battery holder, ensure it is properly closed and batteries are installed correctly, as indicated on the battery holder․ If the thermostat has a battery holder, ensure it is properly closed․ Remember to replace the batteries once a year, according to the manual․ Proceed to the next steps for the initial configuration of the thermostat․
Initial Configuration
After mounting, the thermostat will power on and begin the initial configuration process․ The display will guide you through setting up your system type, date, and time․ Use the thermostat’s buttons to navigate through the menu options and select the appropriate settings․ Pay close attention to the prompts and ensure that you enter correct information․ Incorrect settings may cause malfunctions․ The thermostat may also ask for your location or language preferences․ This step is crucial for proper thermostat operation, and it is essential to complete it accurately․ After initial configuration, the thermostat will prompt you to connect to your WiFi network and complete the setup․ This will allow remote access via Total Connect Comfort Service․

WiFi Connection Process
The Honeywell FocusPro 6000 uses a three-step connection to WiFi․ First, connect your device to the thermostat’s network․ Then, connect to your home WiFi, and finally, register the thermostat․
Connecting to the Thermostat’s WiFi Network
To begin the WiFi connection process for your Honeywell FocusPro 6000, you’ll first need to connect your mobile device, such as a smartphone or tablet, to the thermostat’s unique WiFi network․ This network will typically be named something like “NewThermostatxxxxxx,” where “xxxxxx” represents a unique identifier for your specific thermostat․ This initial connection allows your device to communicate directly with the thermostat, enabling you to proceed with the subsequent steps required to connect it to your home’s WiFi network․ Ensure your device’s WiFi is enabled and search for available networks, then select the thermostat’s network to establish this direct link․ Once connected, you will be ready for the next stage․
Connecting to Home WiFi Network
After successfully connecting your mobile device to the thermostat’s temporary WiFi network, you can proceed to connect the Honeywell FocusPro 6000 to your home’s WiFi network․ This step requires you to use a web browser, typically on your connected mobile device, to access the thermostat’s configuration interface․ You will need to enter a specific address, often “http://192․168․1․1,” into your browser’s address bar․ This will open a page where you can search for available WiFi networks․ Select your home network from the list and enter the network password when prompted․ Once connected, the thermostat will be able to communicate with the Honeywell servers and enable remote control through the Total Connect Comfort service․ This is the final step in connecting your thermostat to your home’s network․
Advanced Features and Testing
The Honeywell FocusPro 6000 offers special function settings and an installer system test․ These tools help customize operation and ensure all components like heating, cooling, and fan work correctly․
Special Function Settings
The Honeywell FocusPro 6000 WiFi thermostat provides a range of special function settings to fine-tune its operation to your specific needs․ These settings allow you to configure various parameters beyond basic temperature control․ For instance, you might have the ability to adjust the cycle rate for heating and cooling, optimizing comfort and energy efficiency․ Furthermore, some models offer options for setting up emergency heat functionality, which is critical in certain situations․ The thermostat’s menu may also include features for customizing backlight behavior, key lock, or other display preferences․ Proper adjustment of these settings ensures that your thermostat works perfectly for your unique setup․ These advanced settings are typically found in an installer or advanced menu, requiring careful navigation and configuration based on your specific system requirements, and the manual will offer guidance on each․
Installer System Test
The Installer System Test is a crucial step in ensuring your Honeywell FocusPro 6000 WiFi thermostat functions correctly after installation․ This test allows you to verify the proper operation of all connected heating, cooling, and fan components․ The system test typically involves a sequence of checks designed to confirm the thermostat’s ability to activate each function․ You might initiate tests for heating, cooling, emergency heat (if applicable), and fan operation, one by one․ During each test, ensure that the corresponding equipment starts and operates as expected․ This test helps to identify and rectify any wiring or configuration issues before relying on the thermostat for daily use․ It is an essential procedure to confirm that your thermostat is ready to maintain comfort efficiently and accurately․ The specific tests may vary depending on the model and connected system․
Additional Information
This section covers important details, such as electrical ratings for the Honeywell FocusPro 6000 WiFi thermostat․ Ensure compliance with specified voltage and current limits to avoid damage and ensure safe operation․
Electrical Ratings
The Honeywell FocusPro 6000 WiFi thermostat operates on a 20 to 30 VAC, 50/60 Hz power supply․ The maximum current draw is 0․8 amps for the thermostat, ensuring compatibility with standard HVAC systems․ It’s crucial to verify that your system’s transformer meets these requirements․ Exceeding the specified voltage or current can lead to thermostat malfunction or damage, and potentially void the warranty․ The thermostat is designed for Class II wiring, which provides a level of safety against electrical hazards․ For proper operation, using a 24 VAC transformer is generally recommended to provide stable power․ Always adhere to these electrical ratings during installation to ensure reliable and safe operation of your device․ Please consult the manufacturer’s official documentation for the most up-to-date specifications before proceeding with the installation․